Calculation of drawing height of cylindrical parts
Calculating the draw height of cylindrical parts is a crucial aspect of drawing process design, directly impacting part quality and material utilization. The draw height refers to the height of the cylindrical part after drawing. Its calculation is based on the blank dimensions, part diameter, material thickness, and the degree of deformation during each drawing cycle, derived from the principle of volume conservation and the laws of plastic deformation. Accurately calculating the draw height prevents part scrapping due to insufficient height or material waste due to excessive height, and is crucial for ensuring the dimensional accuracy of drawn parts.
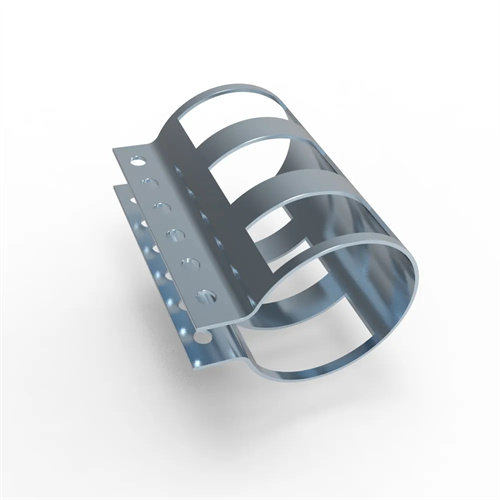
The initial drawing height is calculated based on the blank diameter and the diameter after the initial drawing using the formula: h1 = (D² – d1²)/(4d1) + 0.57 (r1 + R1), where h1 is the initial drawing height, D is the blank diameter, d1 is the diameter after the initial drawing, r1 is the punch corner radius, and R1 is the die corner radius. The first half of the formula is based on the principle of volume conservation (ignoring changes in material thickness), while the second half takes into account the effect of material deformation in the fillet area on the height. For example, if the blank diameter is 100mm, the diameter after the initial drawing is 50mm, the punch radius is 10mm, and the die radius is 15mm, then h1 = (100² – 50²)/(4×50) + 0.57×(10+15) = (10000-2500)/200 + 0.57×25 = 7500/200 + 14.25 = 37.5 + 14.25 = 51.75mm. This calculation result must be rounded to one decimal place as it serves as the basis for subsequent process design.
The calculation of each subsequent drawing height is based on the dimensions of the previous drawing. The formula is: hn = (dn-1² – dn²)/(4dn) + 0.57 (rn + Rn), where hn is the height of the nth drawing, dn-1 is the diameter after the n-1th drawing, dn is the diameter after the nth drawing, and rn and Rn are the punch and die corner radii, respectively, for the nth drawing. As the degree of deformation decreases with each subsequent drawing, the corner radius should also be reduced accordingly (typically 0.7-0.8 times that of the previous drawing) to avoid excessive material accumulation. For example, if the second drawing diameter is 40mm, the punch radius is 8mm, the die radius is 12mm, and the previous diameter is 50mm, then h2 = (50² – 40²)/(4×40) + 0.57×(8+12) = (2500-1600)/160 + 0.57×20 = 900/160 + 11.4 = 5.625 + 11.4 = 17.025mm. The total height is the sum of the first drawing height and the second drawing height (51.75+17.025≈68.775mm).
Correction of the drawing height must account for the effects of material thickness variation and springback. For thick materials (t>3mm), the effect of thickness variation on height must be factored in. The corrected formula is: hn = [(dn-1 + t)² – (dn + t)²]/[4×(dn + t)] + 0.57 (rn + Rn), where t is the material thickness. For example, for a 3mm thick material with a second drawing diameter of 40mm and a previous diameter of 50mm, h² = [(50+3)² – (40+3)²]/[4×(40+3)] + 0.57×(8+12) = (2809-1849)/172 + 11.4 = 960/172 + 11.4, which is approximately 5.58 + 11.4 = 16.98mm. This difference is approximately 0.045mm compared to the result without considering thickness. This corrected formula is required for high-precision parts. In addition, springback will slightly reduce the drawing height (usually 0.1%-0.3%), and a correction amount must be reserved during calculation.
The total height of multiple deep drawing passes must ensure that the final dimensions meet the design requirements. If the calculated total height deviates from the designed height, the diameter or fillet radius of the final deep drawing pass must be adjusted. For example, if the designed height is 70mm and the calculated total height after three deep drawing passes is 68.5mm, the fourth deep drawing pass needs to adjust the third deep drawing diameter from 38mm to 37mm. Therefore, the fourth deep drawing height h4 = (38² – 37²)/(4×37) + 0.57×(6+10) = (1444-1369)/148 + 0.57×16 = 75/148 + 9.12 ≈0.51 + 9.12 = 9.63mm. The total height of 68.5+9.63≈78.13mm still exceeds the designed value. The diameters of each deep drawing pass need to be redistributed to reduce the degree of deformation in the previous passes and increase the height of the final pass.
Verification of the drawing height requires a trial mold. During the trial mold, the calculated blank dimensions and drawing parameters are used, the actual drawing height is measured, and adjustments are made after comparison with the designed value. If the actual height is less than the calculated value, it may be due to insufficient material flow, requiring an increase in the die radius or a decrease in the blank holder force. If the actual height is greater than the calculated value, it may be due to excessive material flow, requiring a decrease in the die radius or an increase in the blank holder force. For example, the actual height of a low-carbon steel cylindrical part after the trial mold was 52.5mm, exceeding the calculated value of 51.75mm. After reducing the die radius from 15mm to 14mm, the actual height dropped to 51.8mm, meeting the requirements. For mass-produced parts, the drawing height parameter determined during the trial mold must be incorporated into the process documentation to ensure production stability.
