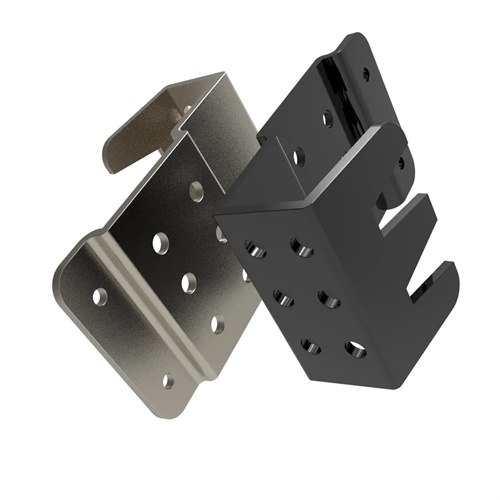
Key points in the design of wedges and sliders
The design of the cam and slider is a critical step in mold design, directly impacting the mold’s motion accuracy, service life, and forming quality. Factors such as force transmission efficiency, motion smoothness, guiding accuracy, strength, rigidity, and wear resistance must be comprehensively considered to ensure accurate coordination and proper force distribution between the cam and slider during operation, without binding or excessive wear. Key design considerations for the cam and slider include selecting the angle of the bevel, determining the clearance, designing the guide mechanism, verifying strength, and designing the lubrication system. Each key element must be optimized based on the specific operating conditions.
The selection of bevel angle is central to wedge design, balancing force transmission efficiency and travel while also considering mold space constraints. A smaller bevel angle α increases the force transfer coefficient (1/sinα), resulting in greater lateral force for the same input force, but also reduces the slider’s travel. A larger angle decreases the force transfer coefficient and increases the travel, but also requires more input force. Common angles range from 15° to 45°, with 30° being the most widely used. At this angle, the force transfer coefficient is approximately 2, and the travel-to-input travel ratio is approximately 1.73, effectively balancing force and travel requirements. For example, for high-strength steel stamping requiring high lateral force, a 15°-20° bevel is selected; for bending processes requiring large travel, a 30°-45° bevel is preferred. The bevel angle tolerance must be controlled within ±0.05°, otherwise it will result in uneven force transmission and increased wear.
The clearance must ensure that the wedge and slider move freely and without noticeable play. Too little clearance can cause binding and heat generation, while too much clearance can affect motion accuracy, causing vibration and noise. The typical clearance is 0.01-0.03mm, with a range of 0.01-0.02mm for high-precision molds (such as electronic component stamping dies) and 0.02-0.03mm for standard-precision molds (such as automotive parts molds). This clearance can be achieved by grinding the contact surfaces of the wedge or slider, or by fine-tuning with shims to ensure uniformity. For example, if a 0.02mm feeler gauge is placed between the contact surfaces of the wedge and slider and slides smoothly without noticeable resistance, the clearance is appropriate. Additionally, a 0.5×45° chamfer should be designed at the ends of the wedge and slider to prevent interference during movement.
Guide design is key to ensuring slider motion accuracy. Guiding methods include rails, post-guide sleeves, and combination guides. Rails are suitable for sliders with long travels. Guide rail cross-sections include rectangular, dovetail, and V-shaped. Rectangular rails offer superior rigidity and are suitable for heavy-load applications; dovetail rails are compact and suitable for space-constrained applications; and V-shaped rails offer high precision and are suitable for high-precision applications. Post-guide sleeve guides are suitable for small and medium-sized sliders, offering high precision (coaxiality error ≤ 0.01mm) and flexible movement. For example, φ10-20mm guide posts and sleeves are commonly used for sliders in electronic molds. Combination guides (e.g., rails and posts) are suitable for large and complex sliders, ensuring both rigidity and precision. For example, sliders in automotive panel molds utilize a combination of rectangular rails and two guide posts. The guide length must be ≥ 1.5 times the slider travel to ensure the slider remains guided throughout its travel.
Strength and stiffness verification is a critical component of the design of the cam and slider, ensuring that plastic deformation or fracture does not occur under maximum load. The strength verification of the cam requires calculating the contact stress of the inclined surface using the formula σ = F/(A×cosα), where F is the lateral force, A is the contact area, and α is the angle of the inclined surface. The contact stress must be ≤ the allowable contact stress of the material (the allowable stress of 45 steel after quenching and tempering is approximately 250 MPa). The strength verification of the slider requires calculating the bending stress of the guide rail to ensure that it is less than the yield strength of the material. Stiffness verification requires controlling the maximum deflection of the cam and slider to ≤0.01 mm/m to prevent deformation from affecting motion accuracy. For example, if a 45 steel wedge is subjected to a lateral force of 100kN, has a contact area of 1000mm², and a bevel angle of 30°, the contact stress σ = 100,000/(1000 × cos 30°) ≈ 100,000/(1000 × 0.866) ≈ 115MPa ≤ 250MPa, meeting the strength requirements. For heavy-duty applications, high-strength materials (such as 40Cr and Cr12) must be used and quenched (hardness 45-50HRC) to improve strength and wear resistance.
Lubrication and wear-resistant designs can extend the service life of the cam and slider. Lubrication grooves and oil holes should be provided on the contact surfaces. Annular or spiral grooves should be 0.5-1mm deep and 3-5mm wide to ensure even distribution of the lubricant. Lubricant selection is determined by operating conditions: grease (such as lithium-based grease) is used for low-speed, heavy-load applications, while oil (such as machine oil N32) is used for high-speed applications. Wear-resistant design includes surface treatment and material pairing. The contact surfaces of the cam and slider can be carburized and quenched (hardness 58-62 HRC) or nitrided (carburized layer depth 0.1-0.3mm) to increase surface hardness. Recommended material pairings include Cr12 (hardened) for the cam and 45 (quenched and tempered) for the slider, or 40Cr (hardened) for both, to avoid adhesive wear caused by mismatched materials. For example, carburizing and quenching the cam bevel (hardness 60 HRC) and nitriding the slider guide surface (hardness 50 HRC), combined with lithium-based grease lubrication, can increase mold life by over 30%.
The limit and reset device design ensures safe operation of the cam and slider. Limit devices (such as stops and travel switches) must limit the maximum travel of the slider to prevent overtravel and damage to the mold. The limit surface must be perpendicular to the slider’s direction of motion, with a contact area of ≥70%. The reset device (such as a spring, nitrogen spring, or cylinder) must ensure that the slider accurately returns to its initial position after the cam returns. The reset force must be 1.5-2 times the slider’s weight. Nitrogen springs are recommended for sliders with long travel, as they offer high reset accuracy (error ≤ 0.05mm) and long life. For example, a 10kg slider can be reset using a nitrogen spring with a spring force of 150-200N to ensure a smooth slider return and a deviation from the initial position of ≤ 0.03mm.
The design of the wedge and slider requires CAE simulation analysis. Finite element software (such as ANSYS and ABAQUS) is used to calculate stress and strain distribution, optimize structural dimensions, and avoid localized stress concentrations. For example, simulations revealed stress concentrations of up to 350 MPa at the corners of a certain wedge. By increasing the corner radius (R5mm), the stress was reduced to 200 MPa, meeting strength requirements. In short, the design of the wedge and slider requires comprehensive consideration of factors such as force, motion, precision, and lifespan. Theoretical calculations, simulation analysis, and accumulated experience ensure an economical and reliable design.
